UICollectionViewWaterfallLayoutを使ってみる
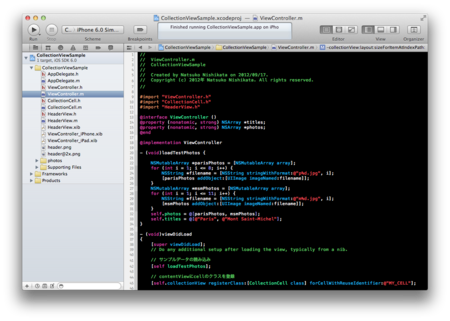
まずはベースとなる CollectionViewSample を Xcode 4.5 で開く。
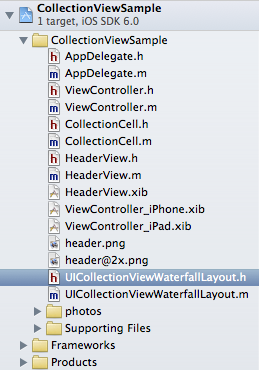
で、ここに UICollectionViewWaterfallLayout.h と UICollectionViewWaterfallLayout.m をドラッグ&ドロップで加える。
次に viewController.h で UICollectionViewWaterfallLayout.h を import して、UICollecitonViewDelegateWaterfallLayout プロトコルを登録。
#import <UIKit/UIKit.h>
#import "UICollectionViewWaterfallLayout.h"

@interface ViewController : UICollectionViewController <UICollecitonViewDelegateWaterfallLayout>

@end
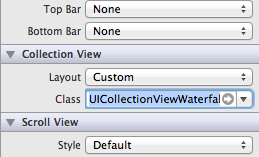
更に ViewController_iPhone.xib で Collection View の Layout を Custom にして、Class を UICollectionViewWaterfallLayout に変更。
(iPad で試したい時は、ViewController_iPad.xib も変更しとこう。)
後は UICollectionViewWaterfallLayout の README に書いてある通りに、レイアウトの設定を記述しておく。
It's your responsibility to set up `delegate`, `columnCount`, and `itemWidth`, they are required. But `sectionInset` is optional.
これは ViewController.m の viewDidLoad で行う。
    [super viewDidLoad];
	// Do any additional setup after loading the view, typically from a nib.

	// Setup UICollectionViewWaterfallLayout.
	UICollectionViewWaterfallLayout *cvwl = (UICollectionViewWaterfallLayout *)self.collectionView.collectionViewLayout;
	cvwl.columnCount = 2;
	cvwl.itemWidth = self.view.bounds.size.width / 2;
	cvwl.delegate = self;


    // サンプルデータの読み込み
    [self loadTestPhotos];
最後に delegate メソッドを実装。
既に実装されている「セルのサイズをアイテムごとに可変とするためのdelegateメソッド」から拝借。
#pragma mark - UICollectionViewWaterfallLayoutDelegate
- (CGFloat)collectionView:(UICollectionView *)collectionView
                   layout:(UICollectionViewWaterfallLayout *)collectionViewLayout
 heightForItemAtIndexPath:(NSIndexPath *)indexPath
{
    UIImage *image = [[self.photos objectAtIndex:indexPath.section] objectAtIndex:indexPath.item];
	return image.size.height;
}
以上で挿げ替えは完了。
とりあえず、これだけで Collection View の見た目が Pinterestっぽくなったよ!
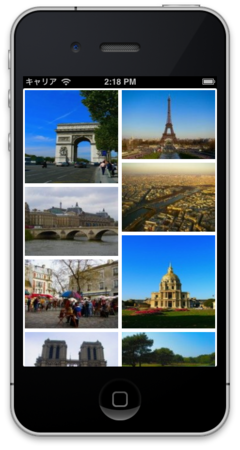
更に itemWidth と sectionInset をどうこうすると、こんな感じに。
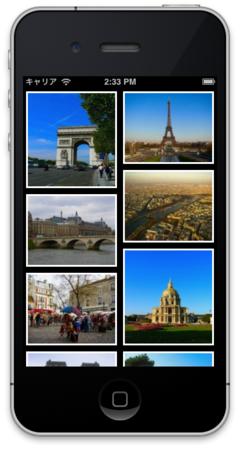
後は画像に影付けて、キャプションを入れて、背景を白くすればもっと Pinterest 風になるかな。
というわけで、Collection View 便利で面白いな〜という話でした。
みんなも GitHub で好みの Collection View の Layout を探してみよう!