Raspberry Pi の Arc Linux を Mac を使ってセットアップしてみた
お盆の時期に到着してそのまま部屋の片隅に放置してあった Raspberry Pi。
ちょっと時間ができたので Mac を使ってセットアップしてみたのでメモ。


Raspberry Pi のセットアップに使ったもの
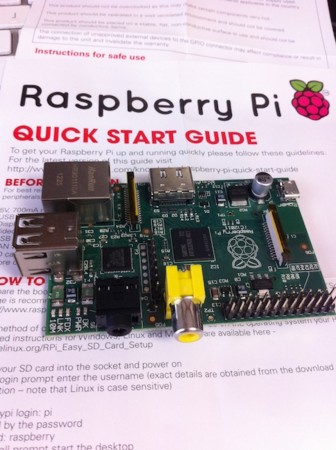
まずは購入した Raspberry Pi とその周辺機器
なぜか AC Adapter は不思議なプラグのものが届いた…。
ってか、なんでオーダーしたんだろう?
変換して使えてるから良いけど。
その他
起動用 Linux イメージの入手
まずは Raspberry Pi 用に用意された Linux のイメージを入手する。
用意されている Linux は下記のページからダウンロードが可能。
今回はせっかくなので今まで使ったことのない Arc Linux(2012-09-28 バージョン)を選んでみた。
ファイルをダウンロードしたら念のためにハッシュをチェック。
iMac-i3-27:raspberry-pi paraches$ shasum ./archlinux-hf-2012-09-18.zip
56e043f3c629f6c408759bcc157d2d635ce0b6af  ./archlinux-hf-2012-09-18.zip
iMac-i3-27:raspberry-pi paraches$
値が同じだったら、ファイルをダブルクリックすると「archlinux-hf-2012-09-18.img」ができあがる。
これでイメージファイルの準備は終了。
SD Card へ Linux イメージをコピー
最初に SD Card をマウントしない状態での Volume をターミナルから df -h コマンドを使用して確認しておく。
iMac-i3-27:raspberry-pi paraches$ df -h
Filesystem                                Size   Used  Avail Capacity  Mounted on
/dev/disk0s2                             465Gi  274Gi  191Gi    59%    /
devfs                                    190Ki  190Ki    0Bi   100%    /dev
map -hosts                                 0Bi    0Bi    0Bi   100%    /net
map auto_home                              0Bi    0Bi    0Bi   100%    /home
/dev/disk0s4                             186Gi   89Gi   97Gi    48%    /Volumes/Data
/dev/disk0s5                             279Gi  6.2Gi  272Gi     3%    /Volumes/MountainLion HD
afp_2T6C8L4nniF318e5Hs2BZ6fY-2.2d000003  1.8Ti  1.3Ti  543Gi    71%    /Volumes/paraches
iMac-i3-27:raspberry-pi paraches$
次に使用する SD Card を iMac の SD Card Reader へ挿入してマウントしたら、また df -h コマンドで確認。
>||
iMac-i3-27:raspberry-pi paraches$ df -h
Filesystem                                Size   Used  Avail Capacity  Mounted on
/dev/disk0s2                             465Gi  274Gi  191Gi    59%    /
devfs                                    193Ki  193Ki    0Bi   100%    /dev
map -hosts                                 0Bi    0Bi    0Bi   100%    /net
map auto_home                              0Bi    0Bi    0Bi   100%    /home
/dev/disk0s4                             186Gi   89Gi   97Gi    48%    /Volumes/Data
/dev/disk0s5                             279Gi  6.2Gi  272Gi     3%    /Volumes/MountainLion HD
afp_2T6C8L4nniF318e5Hs2BZ6fY-2.2d000003  1.8Ti  1.3Ti  543Gi    71%    /Volumes/paraches
/dev/disk1s1                              15Gi  2.2Mi   15Gi     1%    /Volumes/NO NAME
iMac-i3-27:raspberry-pi paraches$
一番下の行、/dev/disk1s1 が 16G の SD Card。
で、この SD Card を diskutil unmount コマンドで Unmount する。
iMac-i3-27:raspberry-pi paraches$ diskutil unmount /dev/disk1s1
Volume NO NAME on disk1s1 unmounted
iMac-i3-27:raspberry-pi paraches$
次に dd コマンドで Linux イメージを SD Card に書き込む。
ここで、書き込み先の指定を間違えると困ったことになる可能性があるので気をつけよう!(ま、Raspberry Pi をこんなタイミングで入手してる人がこの辺りを理解していないとは思えないけど…)
例えば SD Card が /dev/disk1s1 だった場合、書き込み先に指定するのは /dev/rdisk1 になる。
r を最初に付けて、sX の部分を削除すれば OK。
自分の場合は以下のようなコマンドになる。
iMac-i3-27:raspberry-pi paraches$ dd bs=1m if=~/Desktop/raspberry-pi/archlinux-hf-2012-09-18.img of=/dev/rdisk1
1886+0 records in
1886+0 records out
1977614336 bytes transferred in 150.246917 secs (13162429 bytes/sec)
iMac-i3-27:raspberry-pi paraches$
書き込みは 3分弱で終了。
SD Card は Class10 のものを使ったけど、スピードはこんなもんで良いのかな?
これで、SD Card を Raspberry Pi にセットして電源を繋げば Arc Linux が起動する…はず!
Arc Linux を起動して ssh でログインする
とりあえず起動の様子を見たかったので、PS3 に繋がっている HDMI ケーブルと LAN ケーブルを外して Raspberry Pi に繋いでから電源を入れてみた。
起動の様子は以下
無事起動したので、ルーターの設定画面で Raspberry Pi が DHCP でアドレスを取得しているのを確認。
IP アドレスもホスト名も確認できたので、ssh でログインしてみる。
Arc Linux の場合は、ユーザ名「root」でパスワードが「root」になっている。
iMac-i3-27:raspberry-pi paraches$ ssh root@alarmpi
root@alarmpi's password:
[root@alarmpi ~]# ls
[root@alarmpi ~]# df
Filesystem     1K-blocks   Used Available Use% Mounted on
rootfs           1805152 413824   1299632  25% /
/dev/root        1805152 413824   1299632  25% /
devtmpfs           93960      0     93960   0% /dev
tmpfs              94028      0     94028   0% /dev/shm
tmpfs              94028    272     93756   1% /run
tmpfs              94028      0     94028   0% /sys/fs/cgroup
tmpfs              94028      0     94028   0% /tmp
/dev/mmcblk0p1     96050  37064     58986  39% /boot
[root@alarmpi ~]#
Arc Linux で SD Card の余り領域を使えるようにする
次に 16G の SD Card の使っていない部分を使えるようにしてみた。
参考にしたのは以下のページ。
まずは fdisk コマンドで確認。
[root@alarmpi ~]# fdisk /dev/mmcblk0
Welcome to fdisk (util-linux 2.21.2).

Changes will remain in memory only, until you decide to write them.
Be careful before using the write command.


Command (m for help): p

Disk /dev/mmcblk0: 16.1 GB, 16130244608 bytes
4 heads, 16 sectors/track, 492256 cylinders, total 31504384 sectors
Units = sectors of 1 * 512 = 512 bytes
Sector size (logical/physical): 512 bytes / 512 bytes
I/O size (minimum/optimal): 512 bytes / 512 bytes
Disk identifier: 0x000c21e5

        Device Boot      Start         End      Blocks   Id  System
/dev/mmcblk0p1   *        2048      194559       96256    c  W95 FAT32 (LBA)
/dev/mmcblk0p2          194560     3862527     1833984   83  Linux

Command (m for help): 2番目のパーティション(/dev/mmcblk0p2)の Start は 194560。これを覚えておく。
次に d コマンドで2番目のパーティションを削除する。
Command (m for help): d
Partition number (1-4): 2
Partition 2 is deleted
次に n コマンドで新しくパーティションを作成する。
パーティションタイプは primary で、パーティション番号は 2。
First sector は先に覚えておいた数字。(とは言ったけど、ここでデフォルト値として表示される)
Last sector はデフォルトの値。
Command (m for help): n
Partition type:
   p   primary (1 primary, 0 extended, 3 free)
   e   extended
Select (default p): p
Partition number (1-4, default 2): 2
First sector (194560-31504383, default 194560): 194560
Last sector, +sectors or +size{K,M,G} (194560-31504383, default 31504383): 31504383
Partition 2 of type Linux and of size 15 GiB is set最後にパーティション情報を w コマンドで書き込む。
Command (m for help): w
The partition table has been altered!

Calling ioctl() to re-read partition table.

WARNING: Re-reading the partition table failed with error 16: Device or resource busy.
The kernel still uses the old table. The new table will be used at
the next reboot or after you run partprobe(8) or kpartx(8)
Syncing disks.
[root@alarmpi ~]#
w コマンドには結構時間がかかって約25分で終了。
メッセージにもでてるけど、ここで reboot が必要。
[root@alarmpi ~]# reboot

Broadcast message from root@alarmpi on pts/0 (Sun, 14 Oct 2012 09:39:54 +0100):

The system is going down for reboot NOW!

[root@alarmpi ~]# Connection to alarmpi closed by remote host.
Connection to alarmpi closed.
iMac-i3-27:raspberry-pi paraches$
リブート後に再度 ssh で繋いで、resize2fs コマンドで設定。
[root@alarmpi ~]# resize2fs /dev/mmcblk0p2
resize2fs 1.42.5 (29-Jul-2012)
Filesystem at /dev/mmcblk0p2 is mounted on /; on-line resizing required
old_desc_blocks = 1, new_desc_blocks = 1
Performing an on-line resize of /dev/mmcblk0p2 to 3913728 (4k) blocks.
The filesystem on /dev/mmcblk0p2 is now 3913728 blocks long.
df -h で確認してみる。
[root@alarmpi ~]# df -h
Filesystem      Size  Used Avail Use% Mounted on
rootfs           15G  407M   14G   3% /
/dev/root        15G  407M   14G   3% /
devtmpfs         92M     0   92M   0% /dev
tmpfs            92M     0   92M   0% /dev/shm
tmpfs            92M  272K   92M   1% /run
tmpfs            92M     0   92M   0% /sys/fs/cgroup
tmpfs            92M     0   92M   0% /tmp
/dev/mmcblk0p1   94M   37M   58M  39% /boot
[root@alarmpi ~]#
というわけで、残りの領域も使えるようになったよ!
この後にまだシステムのアップデートとかもあるのだけど、とりあえずここまで。
sudo も入ってなかったりするので、色々と入れたりしなきゃならないものが多い。
あと、ちょっと困っているのは 2012-09-18 バージョンの Arc Linux に /etc/rc.conf がない!ってこと。
このバージョンから systemd を使うようになって無くなっちゃったらしいのだけど、pacman で落としてくるサービスが rc.conf がないよ!ってアラートだしたりして気持ち悪い…。
この辺りをちゃっちゃとできる人じゃないと Arc Linux は使っちゃいけないのかな〜。
素直に「Raspbian "wheezy"」をインストールするべきなのか?
このブログのタイトルにも Debianって入ってることだし!
